Sunday, June 30, 2013

PE11: Audio Transitions Problem

INTRODUCTION

The Premiere Elements 11 Audio Transitions Problem "Can't Center Between Two Clips" recently surfaced. The program offers only two audio transitions, both CrossFade type, one named Constant Gain and the other named Constant Power. Both were found to have this same "Can't Center Between Two Clips" issue. Although Premiere Elements transitions have been written about in great depth in this blog*, they were looked at more from the perspective of the many video transitions and digital video rather than the two audio transitions and digital audio.

When one talks about digital video and video transitions and how they work, concepts such as clip handles, untrimmed and trimmed clips, and added or repeated frames to create handles to make the transition work are all brought into the discussion. But what about digital audio where there are no "frames"? Best information gathered suggests that digital audio's "sample" is a counterpart of digital video's "frame".

Once an audio transition is placed between two audio clips, the placement snaps to one of three alignment types, with the type dependent on whether the audio clips are trimmed or untrimmed clips. In versions of Premiere Elements earlier than 11, after the transition is placed between the audio clips (End at Cut, Center at Cut, or Start at Cut), the placed transition can be double clicked to get to the transition editing area for adjustment of the alignment and duration. So, in many instances, even though the "snap to" alignment is not Center at Cut, it can be changed to that in the transition editing area or at the Timeline level.

          2 Untrimmed Clip.
          Snap to Alignment = Start at Cut
          No Alignment change possible in Transition Editing Area or with the mouse cursor at the
          Timeline level..
1st Clip Untrimmed, 2nd Trimmed
Snap to Alignment = End at Cut
Alignment can be changed to Center at Cut in Transition Editing Area, but the End at Cut cannot be changed with the mouse cursor at the Timeline level unless it is replaced first in the Transition Editing Area with either Center at Cut or Start at Cut.
1st Clip Trimmed, 2nd Untrimmed
Snap to Alignment = Start at Cut
Alignment can be changed to Center at Cut in Transition Editing Area, but the Start at Cut cannot be changed with the mouse cursor at the Timeline level unless it is replaced first in the Transition Editing Area with either Center at Cut or End at Cut.

2 Trimmed Clips
Snap to Alignment = Center at Cut
Alignment can be changed in Transition Editing Area and with the mouse cursor at the Timeline level. See Figure 1.
Figure 1. Premiere Elements 10. Two Trimmed Audio Clips. Auto "Snap to" Center at Cut.
ISSUE

New with Premiere Elements 11 is its transition editing area as a Transition Adjustment Pop Up which appears automatically when the transition is placed between 2 clips. In the case of audio transitions, this Pop Up does have the 3 alignment choices Left Clip, Between Clips, and Right Clip, but they are all inactive. A curious note seems to be an active duration field given in seconds and "frames". And, the More section of the Pop Up is absent.

Premiere Elements 11 like earlier versions does have placement of the audio transition with a "snap to" alignment governed by the trimmed or untrimmed nature of the audio clip edges, but the "snap to" alignment type is always pushed to Left Clip when the Transition Adjustment Pop Up is closed with its Done button.

2 Untrimmed Audio Clips
Snap to Alignment = Left Clip
No Alignment change possible in Transition Adjustments Pop or with mouse cursor at Timeline level.

1st Clip Untrimmed, 2nd Trimmed
Snap to Alignment = Left Clip
Transition Adjustment Pop Up "Done" = leaves Left Clip
No Alignment change possible in Transition Adjustments Pop or with mouse cursor at Timeline level.

1st Clip Trimmed, 2nd Clip Untrimmed
Snap to Alignment = Right Clip
Transition Adjustment Pop Up "Done" = pushes to Left Clip
But Alignment can be changed to Between Clips or Right Clip using the mouse cursor at the Timeline level; whereas no change possible in Transition Adjustment Pop Up.

2 Trimmed Clips
Snap to Alignment = Between Clips
Transition Adjustment Pop Up "Done" = pushes to Left Clip
But Alignment can be changed if need be using the mouse cursor at the Timeline level; whereas no change possible in Transition Adjustment Pop Up. See Figures 2  and 3.

Figure 2. Two Trimmed Audio Clips. Auto "Snap to" Between Clips While The Initial Transition Adjustments Pop Up Remains Open.


Figure 3. Two Trimmed Audio Clip. Auto "Snap to" Between Clips  Pushed to Left Clip By Closing Transition Adjustments Pop Up With Its Done Button.

SOLUTION AND HOW TO

Many of the differences between Premiere Elements 11 and 10 and the audio clip transitions go unexplained. Which is "right" and which is "wrong" is speculation but at this time the "wrong" seems to weigh in favor of version 11 and its new Transition Adjustments Pop Up. But, for the immediate Premiere Elements 11 issue of
Can't Center Between Two Clips
If the "snap to" alignment of Between Clips with 2 trimmed audio clips is to be maintained in version 11, it was found that the X (close button) of the Transition Adjustment Pop Up needed to be clicked instead of the "Done" button. We came up with this workaround solution when doing some first hand troubleshooting on the matter with Premiere Elements 11.

Lots of unanswered questions that need to be address on that Pop Up from the Adobe side. More information on this as it becomes available.

ATR

_____________________________________________________________________________
* PE: Video Transitions - Part 1 Slideshow Duration
  and
  PE: Video Transitions - Part 2 How They Work

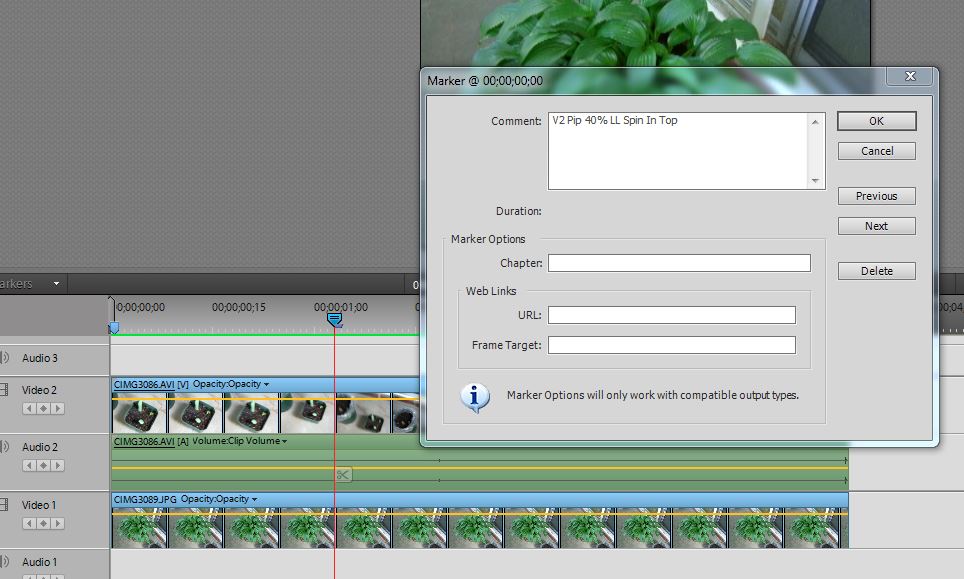
** PE10 & PE11. Typical Audio Clip marking for untrimmed audio clip. Like its trimmed video clip counterpart, when the trimmed audio clip is on the Timeline, it can be stretched at its trimmed edge to regain the whole clip. Unlike its untrimmed video clip counterpart, the untrimmed audio clips worked with so far would appear to have this marking only at the beginning of the clips, not at both the end and beginning of the clip. See Figure **.


Figure**. Gray Clip Marking to Indicate Untrimmed Audio Clip


Thursday, June 27, 2013

PE11: Forget Me Not Clip Details and Timeline Unnumbered Markers

INTRODUCTION

Often in Premiere Elements one creates an effect, thinks it looks great, and wants to repeat it, but forgets what he/she used to create the effect and neglected to write down the details. An assist in this type of situation can come from checking out the Applied Effects Palette* and the effect's panel that was created there when the effect was applied to the clip. This is the case when the fX effect Image Control is applied to a Timeline clip. See Figure 1.

Figure 1. Applied Effects Palette/Image Control Panel After Application Of fX Effect Image Control To Timeline Clip.

But that is not always the case. One example being the application of a PiP (Picture in Picture) effect to a clip. There is no PiP panel to be found in Applied Effects Palette* or anywhere else for the user to refer back to for the choice made.

SOLUTION

Two possibly inviting solutions to the "forget me not clip details" are

  • deduction by observing the effect 
      or
  •  using the comments dialog associated with the placement of an unnumbered marker on the Timeline.

HOW TO

Deduction By Observing The Effect

Example, if PiP Effect was applied to clip (See fX Effects/Presets/PiPs)

1. Observe the applied PiP effect with regard to
  •  Size 25% versus 40% (relative size will do, only two sizes offered)
  •  The final destination for the PiP effect
  •  The action of the PiP effect (Slide, Spin, Scale; In, Out, Top, Bottom, Right, Left)

2. Type in the observed information into the search field of  the Presets area. Refer Figure 2.

Figure 2. Presets Search Field.

If the points below were found by observation, start typing the following in order given for the bold type in the points listed below
  • PiP is the type 
  • Size would be 40%
  • Final  destination would be LL (lower left)
  • Action of PiP would be Spin In Top
consequently the PiP 40% LL Spin In Top would be targeted in the PiP display of choices.

  
Use The Comments Dialog Associated With The Placement Of An Unnumbered Marker On The Timeline

Example, if PiP Effect was applied to clip....

1. Move the Timeline Indicator to the Timeline location where the unnumbered marker is to be placed (in this example, at the beginning of the Timeline @ 00;00;00;00. Then place the marker using the Marker path of Timeline Marker/Set Timeline Marker/Unnumbered as shown in Figure 3.

Figure 3. Setting Timeline Unnumbered Marker.
The Timeline unnumbered marker placed is shown close up in Figure 4.

Figure 4. Timeline Unnumbered Marker (Blue) Placed.

2. Double click the Timeline unnumbered marker to open its dialog in which can be typed details and comments about the clip, including those for the PiP 40% LL Spin In Top. See Figure 5.

Figure 5. Time Unnumbered Marker Dialog For Details And Comments Entries.

________________________________________________________________________________
*For Premiere Elements versions prior to 11, the involved areas would include Properties Palette instead of Applied Effects Palette, and an Effects Palette which displays at its top (to the right of the image thumbnail) a list of the effects applied the the clip. Further, the use of Timeline unnumbered marker and its dialog for clip details and comments can be seen at least back to Premiere Elements 4.

ATR


Monday, June 24, 2013

PE11: Timeline Fade Out Shortcuts and Time Stretched/Time Remapped Video

INTRODUCTION

A Premiere Elements 11 Windows user recently wrote "I want to Fade Out the audio and video for a Time Stretch/Slow Motion video/audio clip at the Timeline level using Timeline Fade Out shortcuts and cannot. Why? And, how do I fix that?" This user finally solved his own problem by first applying the Timeline Fade Out shortcuts for the clip and then using the Time Stretch Tool to apply the slow motion effect, rather than using the Time Stretch Tool first to apply the slow motion effect and then applying the Timeline Fades.

ISSUE

Premiere Elements 11 Windows user's issue and his fix for it were confirmed. But it was discovered other workarounds were available with other considerations.
  • Time Stretch video did not have these problems no matter what was done first, Time Stretch or Fade shortcut application, when shortcuts for Opacity Fade In and Fade Out video from fx Applied Effects/Opacity panel expanded were involved. 
  • The Applied Effects route for a Fade shortcut is only available for video and its Opacity, no Volume Panel there. And, the Volume Panel under Adjust/Adjustments/ does not contain any Fade In Fade Out shortcuts for Volume.
The insights into all this and/or the whys were sought by close look into Timeline Fade In Out Audio and Video shortcuts, Time Stretch, Time Remapping, and fx Applied Effects.

SEARCH FOR WHYS - BASICS FOR FEATURES INVOLVED

Fade In Out Audio and Video Shortcuts

Timeline Level Basics


Premiere Elements 11 offers shortcuts to apply Fade In Out Audio (Volume) and/or Video (Opacity) at the Timeline level by right clicking the Timeline video, selecting Fade, and then the appropriate Fade command. See Figure 1.


Figure 1. PE11 Timeline Fade In Out Video Audio Shortcuts.

fx Applied Effects Level Basics

In addition, fxApplied Effects/Applied EffectsPalette/Opacity Panel expanded includes Fade In Out shortcuts for Video (Opacity). In this case, the Timeline video is selected, then fxAppied Effects is clicked on to get to the Applied Effects Palette/Opacity Panel expanded with its Fade In and Fade Out options. See Figure 2.

Figure 2. PE11 fx Applied Effects Fade In Out Video Shortcuts.

Although the video Fades are found at both the Timeline and fx Applied Effects levels, audio fades appear to be offered only at the Timeline level as shown in Figure 1.

Time Stretch and Time Remapping Basics

Time Remapping is offered in the Expert and Quick views of Premiere Elements 11 under Tools Menu (top of interface) or Tools Tab (bottom of interface); whereas Time Stretch can be accessed only in the Expert view at those locations as well as by right clicking the Timeline clip and selecting Time Stretch. There is no Time Remapping at the Timeline track rubberband level. Time Stretch is used from its dialog in the Premiere Elements workspace; whereas Time Remapping has its own workspace.

Both of these motion effect tools work off the same principle, that is, Speed % change from 100% and addition of frames (for slow motion) and subtraction of frames (for fast motion) based on that Speed% change from 100%.

Time Remapping's 1/8 x, 1/4x, 1/2x, 1x (Normal), 2x, 4x, 8x would be the counterparts of Time Stretch's Speed% 12.5, 25, 50, 100, 200, 400, and 800 respectively. The Speed% change from 100%
reflects what is happening at the frame level:
  • 12.5 %, every 1 frame becomes 8
  • 25%, every 1 frame becomes 4
  • 50%, every 1 frames becomes 2
  • 100%....original
  • 200%, every 2 frames become 1
  • 400%, every 4 frames become 1
  • 800%, every 8 frames become 1   
With Time Stretch, the motion effect is applied to the whole clip and is not varied across the duration of the clip. If one wanted to do "ramp slow motion" with Time Stretch, the clip would have to be cut and the motion effect applied to the split clips. In Time Remapping, sometimes called Speed Ramps,  Time Zones can be created across the clip to allow for varying the motion effect across the clip. Premiere Pro CS3 and higher's Time Remapping uses Speed Keyframes at the Timeline rubberband level to achieve its motion effect. In Premiere Elements 11's version of Time Remapping no keyframes are seen by the user anywhere in the project when the Time Zone is selected and the motion effect applied. Interestingly, when one of the Time Remapped clips is looked at in the Time Stretch dialog when it gets back in the Premiere Elements workspace,  the Time Stretch dialog shows Speed% 100 and Duration 0. Keep this thought when we try to get to the bottom line in the search for the whys.
Of note is the pop up message "does not work for..." that appears when attempting to use a Time Stretched video clip in the Time Remapping Feature. See Figure 3.

Figure 3. Time Remapping File Requirements.
Audio linked to Video can be brought into the Time Remapping workspace, but is ignored in the Time Remapping of the Video. Time Stretch will affect both audio and video of the selected clip; but, it does offer a "Maintain Audio Pitch" option to try to lessen audio distortion resulting from application of the motion effect.


SEARCH FOR WHYS - TEST RESULTS

If FIRST Time Stretch/Slow or Fast Motion, then SECOND Timeline Fade In Fade Out Shortcuts

  • NO FADE OUT For TIME STRETCH SLOW MOTION CLIP. When using Timeline Fade Out shortcuts, no Fade Out Audio, Fade Out Video, Fade Out Audio and Video were obtained for video to which a slow motion effect had been applied to the clip with the Time Stretch Tool (Speed % less than 100%). 
  • AVAILABLE FADE IN For TIME STRETCH SLOW MOTION. By contrast, the Timeline shortcuts for Fade In Audio, Fade In Video, Fade In Audio and Video apply the Fade. For each Fade In Video or Fade In Audio, two keyframes were placed by the Timeline shortcut, one at the start of the Timeline and the second at a point to give the Fade In Video or Audio a duration that was related to the Speed % change from 100%, See Table 1.
Table 1. Time Stretched Video, followed by application of Timeline Fade In Fade Out shortcuts.


  • FADE IN FOR TIME STRETCH FAST MOTION VIDEO APPLIED BUT END OF CLIP MISJUDGED.. When the study was repeated with Time Stretch/Fast Motion clip, instead of Slow Motion, Timeline shortcut Fade Out did apply a Fade Out to the Time Stretch/Fast Motion clip, including the two keyframes for the keyframe duration, but then the end of the clip appeared to be badly misjudged so that the Fade Out occurred well before the end of the clip. See Clip Duration column in Table 1 for total number of frames for the video AND Fade Out Keyframes column and the frame number for the placement of the end keyframe for the Fade Out. Compare in Table 1, 
          100% 3401 vs 3401
          200% 1700 vs 850
          400% 850 vs 212
          800% 425 vs 53

          In spite of end frame recognition matter, the Fade Duration for the prematurely placed Fade           Out in the Time Stretch/Fast Motion study appeared to be related to the Speed % change
          from 100% as seen when dealing with Time Stretch/Slow Motion and application of Timeline
          Fade shortcuts.         


If FIRST Timeline Fade In Fade Out shortcuts, then SECOND Time Stretch/Slow or Fast Motion

Ordering the workflow Fades first, Time Stretch second appeared to resolve the issues
  • Fade Out (Timeline shortcuts) Keyframes not being applied to Time Stretch/Slow Motion
  • Fade Out (Timeline shortscuts) Keyframes  seeming to misjudge the end frame of Time Stretch/Fast Motion.
      also of note
  • Fade Duration, like the Clip Duration, that results continued to be related to Speed% change from 100%.
          Please refer Table 2
.
Table 2. Timeline Fade In Fade Out shortcuts, followed by Time Stretch Effect application.

If FIRST Time Remapping/Slow or Fast Motion (whole clip), then SECOND Timeline Fade In Fade Out Shortcuts
versus
If FIRST Timeline Fade In Fade Out Shortcuts, then Time Remapping/Slow or Fast Motion (whole clip)

When Time Remapping replaced Time Stretch in these studies, problems struck the FIRST Timeline Fade In Fade Out Shortcuts workflow. These problems included:
  • Missing Fade Outs dealing with Fast Motion clip, and prematurely placed Fade Outs for Slow Motion clip.
  • Clip Duration still related to Speed% change from 100%, but Fade duration not seeming to be related to Speed % from 100% and remaining at 30 frames as the motion effect was varied in the Time Remapping workspace. 
also of note

          Best ordering of steps turned out to be the reverse of that determined for the Time Stretch
          Tool for motion effect in these studies, that is, best ordering of steps

          Time Stretch Tool for motion effect
          FIRST Timeline Fade In Fade Out shortcuts, then SECOND Time Stretch/Slow or Fast  
          motion

          Time Remapping for motion effect
          If FIRST Time Remapping/Slow or Fast Motion (whole clip), then SECOND Timeline
          Fade In Fade Out Shortcuts

          See Tables 3 and 4.

Table 3. First Time Remapping/Slow or Fast Motion (whole clip), then Second Timeline Fade In Fade Out Shortcuts.


Table 4. First Timeline Fade In Fade Out Shortcuts, then Second Time Remapping/Slow or Fast Motion (whole clip).

SOLUTIONS

Use Step Ordering

For Time Stretch and Timeline Fade Shortcuts
FIRST Timeline Fade In Fade Out shortcuts, then SECOND Time Stretch/Slow or Fast  
motion

For Time Remapping and Timeline Fade Shortcuts
FIRST Time Remapping/Slow or Fast Motion (whole clip), then SECOND Timeline
Fade In Fade Out Shortcuts

SPECULATION

Premiere Elements, unlike Premiere Pro CS3 and higher, does not feature a way for the user to keyframe the Speed control. In Premiere Elements 11, Speed % change from 100% seems to drive the Time Stretch and Time Remapping feature in creating the slow or fast motion effect. This Speed % change from 100% is clearly evident in the resulting Clip Duration after the application of the motion effect, be it with the Time Stretch or Time Remapping Tool.

When Timeline shortcuts for Fade In Out Video Audio get involved in a Time Stretch or Time Remapping clip workflow, programming must exist for the recognition of the start frame and end frame of the motion effect adjusted clip. Although there can be only one start frame for that clip, the end frame can vary with the addition of frames (slow motion) or subtraction of frames (fast motion). Where the Fade traces back to get the information for keyframe placement on the clip as well as the Fade Duration would seem the likely spot for the issue.

In the case of Time Remapping, it looks like it is tracing back to Speed % = 100% whereas in the case of Time Stretch it looks like it is tracing back to the Speed % change from 100. Note that Fade Duration for Time Stretch clips is related to Speed % change from 100%; whereas Time Remapping appears to be linked to Speed % = 100.

All guesses, no insider information.All needs thinking about some more.


ATR


PE: Looping DVD-VIDEO on DVD Disc

INTRODUCTION

Premiere Elements (any version) does not offer a feature that takes its Timeline content and burns it to DVD disc in DVD-VIDEO format which loops. Some have found that the easy way out is use of the player repeat function to loop the DVD-VIDEO format on DVD disc that the Premiere Elements produces.

However, the VIDEO_TS from Premiere Elements' burn to folder or the VIDEO_TS ripped from the DVD from Premiere Elements' burn to disc can be used in conjunction with 3rd party software to get the looping DVD-VIDEO movie. Two popular 3rd party software for this task are IfoEdit and Pgcedit.

The basic Windows Only scheme is
  • Edit the VTS_01_0.IFO  in the VIDEO_TS Folder in IfoEdit or PgcEdit
  • Burn just the VIDEO_TS Folder which includes the edited VTS_01_0.IFO file to a DVD disc with a program such as the free ImgBurn which will place the DVD structure on the DVD disc in the correct disc file system.
HOW TO

IfoEdit

Download and install the IfoEdit program (version 0.971 as of December 7, 2017)
http://www.afterdawn.com/software/cd_dvd/create_dvd/ifoedit.cfm

STEP 1. Open IfoEdit and click on Open. See Figure 1.

Figure 1. IfoEdit Open Button

STEP 2. Browse to the VIDEO_TS Folder on the hard drive save location and select the VTS_01_0.IFO file in the VIDEO_TS Folder Open dialog. See Figure 2.

Figure 2. Selection of VTS_01_0.IFO File For Editing

STEP 3. After you click Open to the Open dialog in Figure 2 (with File name set for VTS_01_0.IFO), search for the VTS_PGCITI in the top section of the readout shown in Figure 3. When the VTS_PGCITI is clicked on, a plus sign will appear to the left of its name. Click on the plus sign to reveal the VTS_PGC_1 directly below the VTS_PGCITI.

Figure 3. Finding VTS_PGCITI

STEP 4. Now in the lower part of the IfoEdit workspace that appears when the VTS_PGC_1 is selected, scroll for and look for the wording PGC Command Table. There may or may not be one. In this case, there was no PGC Command Table. See Figure 4.

Figure 4. Search for PGC Command Table. None found in this case.

STEP 5. When there is no wording for PGC Command Table, a Post Command needs to be added. To do that, right click on the line "There is no PGC Command Table" and, in the drop down menu, select "Add Post Command". See Figure 5.

Figure 5. Add Post Command
If there is a line that reads PGC Command Table, there should be a Post Command at its bottom for use. In that case, omit the Add Post Command step and continue with Step 7's directive to "right click the Post Command line and select Edit Command.


STEP 6. After the "Add Post Command" is selected, the readout in the lower portion of the page will now show PGC Command Table at the bottom of which is the Post Command that was just added. See Figure 6. Now right click this Post Command line and select Edit Command.


Figure 6. Editing Post Command

STEP 7. After the Edit Command is selected, the Change Command dialog will appear. Change the NOP to (Jumpt_VTS_PTT) Jump to Chapter, setting Title Nr: to 1 and Chapter Nr: to 1. Click OK. See Figure 7.

Figure 7. Change Command Dialog. NOP to (Jump_VTS_PTT) Jump to Chapter, setting Title Nr: 1 and Chapter Nr: 1.

STEP 8. Next click on the Save button at the bottom left of the workspace. See Figure 8.

Figure 8. Save Button Main Page.

 STEP 9. When the Save button is hit, the Save As dialog will appear as shown in Figure 9.

Figure 9. The Saving of the Edited VTS_01_0.IFO File


STEP 10. When the Save button in the Save As dialog is hit, a pop up will appear. Click Yes.
See Figure 10.

Figure 10. .BUP Message


STEP 11. After selecting Yes, the IfoEdit workspace reappears with the choice to DVD Play and/or Quit.

STEP 12. Take the VIDEO_TS now containing the edited VTS-01_0.IFO file and burn it from its hard drive save location to DVD disc with the ImgBurn program.
http://www.afterdawn.com/guides/archive/burn_dvd_folder_imgburn.cfmhttp://www.afterdawn.com/guides/archive/burn_dvd_folder_imgburn.cfm

Link for download of the free ImgBurn program is included in the above link which includes instructions for the VIDEO_TS to DVD-VIDEO steps. ImgBurn and IfoEdit appear to be Windows Only programs.


PgcEdit

Download and install the PgcEdit program.
http://download.videohelp.com/r0lz/pgcedit/http://download.videohelp.com/r0lz/pgcedit/

STEP 1. Open PgcEdit and click Open. See Figure 1.

Figure 1. PgcEdit Open.


STEP 2. After clicking on the Open button, a Browse for Folder Dialog will appear. Browse to and select your VIDEO_TS Folder. Then click OK on the Browse for Folder Dialog. See Figure 2.

Figure 2. Browse For VIDEO_TS Folder.

STEP 3. Clicking OK to the Browse For Folder Dialog will display the PgcEdit workspace as shown in Figure 3.

Figure 3. PgcEdit Workspace.

STEP 4. In the column to the left of the PgcEdit workspace, click on the line that reads
VTST 1,1 TTN1 (1:00) Title 1 so that the PgcEdit workspace displays as shown in Figure 4.
The (1.00) shown here in VTST 1,1 TTN1 (1.00) Title 1 will vary since it the time for the particular video involved.

Figure 4. PgcEdit Workspace after VTST 1, 1 TTN1 (1:00) Title 1 is selected.


STEP 5. Select the line that reads ********** post commands. Then right click that line and select "Add after" from the drop down list that appears. See Figure 5.

Figure 5. ********** Post Commands/Add After.

STEP 6. After **********posts commands/Add After is selected, a 1 NOP line will appear under **********post commands. See Figure 6.

Figure 6. ********** Post Commands/1 NOP line.


STEP 7. Right click the 1 NOP line and select Edit Cmd. At this point the PgcEdit-Command Editor dialog will appear as shown in Figure 7.

Figure 7. PgcEdit-Command Editor Dialog Before Setting.


STEP 8. Click on the Jump to header of the PgcEdit-Command Editor and then on the chain
VTST Title in same VTS
JumpVTS_TT
The PgcEdit Command Editor settings should look like those in Figure 8 immediately before
 clicking OK to that dialog. See Figure 8.

Figure 8. PgcEdit-Command Editor Dialog Final Settings.

STEP 9. After clicking OK to the PgcEdit-Command Editor Dialog, the PgcEdit workspace left present the finalized settings as in Figure 9.

Figure 9. PgcEdit after PgcEdit-Command Editor Final Settings

At this point, go to File Menu/Save DVD. After clicking on Save DVD, a PgcEdit: Save DVD dialog will appear stating that "DVD Saved OK" and "VTS sectors (standard method) OK!" After clicking OK to the Save DVD dialog, go to File Menu/Quit.


STEP 10. IMPORTANT. The PgcEdit workflow results in the addition of a "PgcEdit-backup folder" in the VIDEO_TS Folder containing the edited VTS_01_0.IFO file. See Figure 10.

Figure 10. VIDEO_TS content at the end of the PgcEdit looping procedure.
That "PgcEdit-backup folder" has to be deleted from this VIDEO_TS Folder at its hard drive save location before burning the VIDEO_TS to DVD  with ImgBurn.

STEP 11. Take the VIDEO_TS now containing the edited VTS_01_0.IFO file and burn it from its hard drive save location to DVD disc with the ImgBurn program.
http://www.afterdawn.com/guides/archive/burn_dvd_folder_imgburn.cfmhttp://www.afterdawn.com/guides/archive/burn_dvd_folder_imgburn.cfm

This blog post will be updated soon regarding looping DVD-VIDEO method applicability for Windows 8 64 bit and Mac.

ATR


Friday, June 14, 2013

PE: Video Transitions - Part 2 How They Work

INTRODUCTION

Using Premiere Elements 10* Windows, the focus is going to be on side by side (no gap between) clips and the last frame of the first clip up against the first frame of the second clip. The goal is to try to explain what is going on when placing a video transition to make a gradual, rather than abrupt, transition from one clip to the next. Extra frames needed to get the transition to work are often obtained from trimming video clips in the Preview Windows with its Set In Set Out points or trimming the video clip with the Split Clip Tool (aka Scissors Tool).

That does sound a bit strange trimming a clip to get extra frames for the transition to use, but explanation coming any minute. By contrast, for getting extra frames for stills we would think about just  increasing the still default duration in preferences or dragging out the still on the Timeline with the Selection Tool. All this so that the handles have enough frames to make the transition.

What are handles? Handles can be thought of as the number of frames at the end first clip and the number of frames at beginning of the second clip that are needed to make the transition work. Sometimes these handles can be made up of the video clip's original frames OR frame repeats of the end frame of the first clip and frame repeats of the first frame of the second clip OR extra frames from beforehand trimming of the clip (Preview Window Set In Set Out Points or with Scissors Tool.) Best we build the foundation for Premiere Elements transition/clip handles and such from the following examples of trimmed, untrimmed/video or still clip.

VIDEO CLIP HANDLES EXPLAINED BY EXAMPLES

CASE 1

Let us say that we have a video clip composed of A, B, and C. If we try to shorten or increase its length on the Timeline using the Selection Tool, we cannot. If we use the Time Stretch, we can shorten or increase its length but we end up with fast or slow motion as the program subtracts or adds frames along the whole length of the clip. To the contrary, if we trim the clip in the Preview Window with the Set In Set Out points or use the Scissors Tool to obtain a trim consisting of only B, the file B on the Timeline can be dragged out with the Selection Tool to recover A and C, displaying our whole file again with its A, B, and C intact.

When B was on the Timeline, A and C were not really cut out. They were really still there, but they were not visible until we dragged them out with the Selection Tool. So, when we see someone saying that the transition is using frames from a trimmed clip, those frames could be, in this example, the frames from A or C, whichever end is involved in the transition with the next clip.

CASE 2

In the case of the untrimmed video clip, the first frame at its beginning is its first and the last frame at its end is its last. In this instance, we might be talking about extra frames in terms of repeats/copies of the first or last frame of that clip in lieu of "frames from trimmed clips" to make the transition. You can actually tell whether a transition is using frame copies/repeats versus trimmed clips to make the transition by viewing its display in the Edit Transition/Show Timeline section*.

CASE 3

All sorts of possibilities exist in transition duration and alignment and whether or not the transition will work, depending on the nature of the end of the first clip and the beginning of the second clip. Your attention gets drawn to this type of situation when you find that you want to align a transition Center at Cut and the transition will place only Start at Cut or End at Cut. The cut representing the junction of the first and second clip involved in the transition. In some instances where you cannot align the transition as wanted on the Timeline, you might be able to force the placement by going to Edit Transitions/Alignment and set the alignment there if it is not grayed out*.

UNTRIMMED/TRIMMED CLIPS - TRANSITION ALIGNMENT GUIDELINES AS FOUND IN ADOBE HELP

TWO TRIMMED CLIPS

If both clips contained trimmed frames at the cut, you can center the transition over the cut or align it on either side of the cut so that it either starts or ends at the cut. See Figure 1.  A clip that has not been trimmed has a rounded edge in the upper-right corner of the clip. See Figure 1a.


Figure 1. View of Timeline, Edit Transition Area with its Show Timeline section when dealing with both video clips containing trimmed frames at cut.


Figure 1a. Rounded Edge in the upper right corner of the clip seen when dealing with a trimmed video clip.


TWO UNTRIMMED CLIPS

If neither clip contains trimmed frames, the transition autoamtically centers over the cut and repeats the last frame of the first clip and the first frame of the second clip to fill the transition. (Diagonal bars appear on transitions that use repeated frames.) See Figure 2.


Figure 2. View of Timeline, Edit Transition Area with its Show Timeline section when dealing with both video clips that do not have trimmed frames at the cut.


FIRST CLIP TRIMMED, SECOND UNTRIMMED

If only the first clip contains trimmed frames, the transition automatically snaps to the In point of the next clip. In this scenario, the first clip's trimmed frames are used for the transition, and frames are not repeated in the second clip. See Figure 3.


Figure 3. View of Timeline, Edit Transition Area with its Show Timeline section when dealing with first video clip trimmed and second video clip not trimmed at end of the first video clip and the beginning of the second video clip respectively.

SECOND CLIP TRIMMED, FIRST UNTRIMMED

If only the second clip contains trimmed frames, then the transition snaps to the Out point of the first clip. In this scenario,the second clip's trimmed frames are used for the transition, and frames are not repeated in the first clip. See Figure 4.


Figure 4. View of Timeline, Edit Transition Area with its Show Timeline section when dealing with second video clip trimmed and first video clip not trimmed at the end of the first video clip and the beginning of the second video clip respectively.

As posted in PE: Video Transitions Part 1 Slideshow Duration, this is my understanding of the Premiere Elements Transition situation based on what I have read and my own observations when dealing with Premiere Elements video transitions. I have no insider information on this. Please review the information presented and determine if you interpret the information the same.

____________________________________________________________________________
* Premiere Elements 10 on Windows 7 64 bit (NTSC DV Standard project) was used in this study, and the principles presented are applicable as well to version 4, 7, 8.0/8.0.1, 9.0/9.0.1, and 11.  However, for version 11, the Show Timeline section is gone. And, new to Premiere Elements 11 is the Transition Adjustments pop up which contains the old options for transition duration in seconds and frames and alignment for Left Clip (formerly Start at Cut), Between Clips (formerly Center at Cut), and Right clip (formerly End at Cut). A More button is used to access the rest of the pop up which contains the Play transition option and adjustment of the Start/End points of the transition. See Figure 5 and 6.

Figure 5. Premiere Elements 11 Transition Adjustments Pop Up when Transition is placed. Before More Button Options. No Show Timeline section


Figure 6. Premiere Elements 11 Transition Adjustments Pop Up when Transition is placed. More Button Options shown.
The Transition Adjustment Pop Up** presents in accord with the Adobe's Transition Alignment Guidelines described above in that, when the transition is placed, the pop up appears with the appropriate alignment type selected but does allow for change. For example:

For Two Trimmed Clip, opens on "Between Clips"
For Two Untrimmed Clips, opens on "Between Clips"
For First Trimmed Clip and Second Untrimmed Clips, opens on "Right Clip"
For Second Trimmed Clip and First Untrimmed Clips, opens on "Left Clip"

**Serious problems have surfaced regarding Premiere Elements 11 and its handling of audio transitions and new Transition Adjustments Pop Up. A new blog post will be devoted to this matter.

ATR


PE: Video Transitions - Part 1 Slideshow Duration

INTRODUCTION

Video transitions and what was going on with them caught my attention recently when I was looking at Lightroom 4.1 Slideshow Module and its photo slideshow and found that adding its one and only choice of transition (Fade) to the photos in the slideshow resulted in a significant increase in the total duration of the slideshow. This had its implications when trying to cut music for a slideshow. Since I had not run into this in Premiere Elements, for starters I decided to do some video editor comparative studies to get a better idea of what Premiere Elements was doing that the other programs were not.

Comparative Overview

The assets for these tests included 147 jpg photos sized 3264 x 2448 pixels (4:3), each photo set for 5.00 second duration which should give us a "photos and no video transitions" time of 12.15 minutes (735 seconds). The transition duration in each program was set at 2.00 seconds. The slideshow duration results before and after application of video transitions to the photos in the slideshow fell into 3 camps:

  • No Change in Slideshow Duration with Application of Video Transitions 
          (a) Premiere Elements 10* (Cross Dissolve or Dip to Black Transition)
               BEFORE, Photos: 735 seconds and AFTER, Photos + Video Transitions: 735
               seconds

  • Decrease in Slideshow Duration with Application of Video Transitions
          (a) Windows Live Movie Maker 2011 (Cinematic - Fade to Gray Transition)
               BEFORE, Photos: 735 seconds and AFTER, Photos + Video Transitions: 491.67
               seconds
  
          (b) iMovie, not tested, but from what read, Photos + Video Transitions (all except
               Overlap Transition): decrease, so expected results would be
               BEFORE, Photos: 735 seconds and AFTER, Photos + Video Transitions: 443
               seconds.

  • Increase in Slideshow Duration with Application of Video Transitions
          (a) Lightroom 4.1 Slideshow Module (Fade Transition)
               BEFORE, Photos: 735 seconds and AFTER, Photos + Video Transitions: 1034
               seconds

          (b) ProShow Producer 5.0.3256 Blank Show Mode (Cross Fade Blend Linear Transition)
                BEFORE, Photos: 735 seconds and AFTER, Photos + Video Transitions: 1029
                seconds
                Note: This increase in slideshow duration with application of Video Transitions was also
                seen in the case of ProShow Producer 5.0.3256 Wizard Mode/Theme, Picture Pages
                where the Wizard created the slideshow product, varying both photo duration
                (around 5 seconds) and transition type and duration (around 3 seconds) across the
                slideshow. In that case,  
                BEFORE, Photos: 735 seconds and AFTER, Photos + Transitions et al.: 1198.41 
                seconds.

           (c) CyberLink Power Producer v5 (Fade Transition)
                 BEFORE, Photos: 735 seconds and AFTER, Photos + Video Transitions: 1026
                 seconds
      
For group 2 and 3 above, the set 5 second photo duration and 2.00 second transition duration never changed, while the slideshow duration decreased or increased by a factor of transition duration x number of photos involved in a transition. But this decrease or increase would plateau at a certain point unless the photo duration was increased for a fixed transition duration or the transition duration decreased for a fixed photo duration. Also, there was no difference in these slideshow duration results if the "clips" involved for the transition were photo-photo, photo-video, or video-video.

Suggested Explanation for Differences

Obviously these programs are not all handling transitions the same. How do they differ? Based on what I have read and until proven otherwise, here is my take on that question. The following is not written in stone nor does it represent any insider information.

Programs Characterized by Decreases in Slideshow Duration with Application of Video Transitions

For this we will use the model of 2 photos each with 5 second duration...so side by side, no space between, the total length is 10 seconds. At that stage, you have the last frame of the first photo up against the first frame of the second photo. We want a more gradual transition. We want to apply a 2 second Cross Dissolve transition. Envision picking up the first photo and placing the last 2 seconds of it overlapping the first 2 seconds of the second photo. You now have a total length of 8 seconds instead of 10. The transition must have enough frames at the end of the first photo and the beginning of the second photo to make the transition, otherwise it will not work. We see this in the case of the tests with Windows Live Movie Maker 2011, wherein increasing the photo duration from 5 to 7 seconds, allows us to use a transition with the greater duration. (Interestingly, the program's default is photo duration 7.00 seconds and transition duration 1.50 seconds versus our 5 and 2.) In and Out points are more familiar to us in terms of video, but have been addressed to photos as well, using increased photo duration in preference as one means of obtaining extra frames for the process.

Programs Characterized by Increase in Slideshow Duration with Application of Video Transitions

Let us use the same model as above, 2 photos each with 5 second duration..so side by side, no space between, the total length is 10 seconds. Remember the key to all this is that the transition has enough frames on the end of the first photo and the beginning of the second photo to make the transitions. In this case envision the last frame of the first photo being copied/repeated to add on 2 seconds there AND the first frame of the second photo being copied/repeated to add on 2 seconds there. Now envision picking up the first photo and placing the last 2 seconds (added frames) of it to overlap the first 2 seconds (added frames) at the beginning of the second photo. You now have a total length of 12 seconds instead of 10.

Premiere Elements Characterized by No Change in Slideshow Duration with Application of Video Transitions

Again using the model of 2 photos each with 5 second duration...so side by side, no space between, the total length is 10 seconds. Again, the focus point is that the transition has to have enough frames on the end of the first photo and the beginning of the second photo to make the transition without shortening the length as a result of overlapping. We are going to apply the Cross Dissolve transition with a 2 second duration. To make that transition, the program copies/repeats the last frame of the first photo for 1 second AND copies/repeats the first frame of the second photo for 1 second. Now envision overlaying the end 2 seconds of the first photo (now consisting of 1 second photo frames, 1 second of copied frames) with the beginning 2 seconds of the second photo (now consisting of 1 second photo frames, 1 second copied frames). You now have a total length of 10 seconds as for before the transition application.

Wrap Up Of Introduction

The theoretical and speculative aspects of video transition placement may be more than you might want to know about applying video transitions. If that is the case, please then take away from the above
Using Premiere Elements, the application of video transitions to side by side photos on a Timeline video track does not change the total duration of the photos involved unlike other programs that do.
The  blog post "PE: Video Transitions - Part 2 How They Work" answers some practical questions involving video transitions and Premiere Elements only, such as:

(a) What are clip handles all about? What are the In and Out points of a clip (video and still) and how are they set and how do they relate to "clip handles" and this transitions business? What are those tiny gray areas at the top right of left of one of my clips?

(b) Why won't the program allow me to align the transition the way I want it? It will not give me a Center at Cut, only Start at Cut or End at Cut?

(c) What transition editing opportunities do I have and what valuable information can I get from the transition editing area, especially the Show Timeline view there?


_______________________________________________________________________________
 * Testing was done using Premiere Elements 10 Window 7 64 bit, NTSC DV Standard project. Principles are applicable to other versions of Premiere Element.


Sunday, June 9, 2013

PE11: Video and Audio Track Content Rubberband

INTRODUCTION

Premiere Elements 11 and earlier versions have controls at the Timeline track level for several properties, such as, Opacity and Motion for video track and Clip Volume and Balance for audio track. The controls utilize an orange line called rubberband that stretches horizontally across the track content. Clicking and dragging up or down on the track content's rubberband can adjust the value of the property selected at the video or audio track level.

Figure 1. Video Track and Audio Track Rubberband Details.


Keyframes are used to change properties of video or audio effects over time. Typically this is seen done in the Applied Effects Palette (for video track content) and Adjust Tab/Adjustments Palette (for audio track content). However, quick and easy adjustable keyframes for the properties mentioned can be set by holding down the Ctrl key of the computer main keyboard and clicking on the rubberband. The keyframes set for video track content Opacity or Motion properties at the Timeline rubberband level are reflected in Applied Effects; whereas, the keyframes set for audio track content Volume or Balance properties at the Timeline rubberband level are reflected in Adjust Tab/Adjustments Palette. See Figure 2 and 3.

Figure 2. Video Track Rubberband Opacity Keyframes. Rubberband and Applied Effects Locations.

Figure 3. Audio Track Rubberband Clip Volume. Rubberband and Adjust Tab/Adjustments Locations.

By default the rubberband of the video track represents Opacity property. But, that can be changed to a Motion property option by clicking on the tiny arrow at the end of the video track's clip title, selecting Motion followed by one of the Motion properties in the drop down list that appears. See Figure 1.The Motion Property options are Position, Scale, Constrain Proportions, Rotation, Anchor Point, or Anti-Flicker filter. The Opacity choice is just Opacity.

By default the rubberband of the audio track represents Clip Volume property. But that can be changed to Volume:Bypass, Balance:Bypass, or Balance:Balance by clicking on the tiny arrow at the end of an audio track's clip title and making the choice between Volume and Balance options. See Figure 1.

ISSUE

Time Remapping for creating slow and fast motion effects is a new feature in Premiere Elements 11. In Premiere Pro CS3 and higher, the video track content rubberband choices appear to be Motion, Opacity, and Time Remapping. So when this new Time Remapping feature appeared in Premiere Elements 11, it was asked "Is Premiere Elements 11's Time Remapping included with Opacity and Motion as a choice in the drop down list for controls at the video track content rubberband level?" The answer was found to be no.

SOLUTION

There is no solution to "no Time Remapping option" in the video track's clip rubberband drop down list of choices. According to the expression, "it is what it is".The Premiere Pro CS3 Time Remapping over time involves setting Speed Keyframes at the video track rubberband level. By contrast, Premiere Elements 11 Time Remapping is not done at the video track rubberband level but instead has it own workspace, and, even though Speed and Duration are part of its Time Remapping feature, there are no keyframes for the process to be seen by the user in the Applied Effects or Adjust/Adjustments area as well as the video track rubberband of the Premiere Elements Edit workspace or its special Time Remapping workspace.

A later blog post will to go into how Premiere Elements 11's Time Stretch and Time Remapping are presenting and working in Premiere Elements 11, including what is happening at the video frame level in creating slow or fast motion effects with these tools.


ATR