In Premiere Elements 15, Adobe introduces a "Haze Removal video effect" targeted at removing "haze, fog, and smog" in videos (in particular videos of landscapes). The Adobe document on this effect can be found HERE.
ISSUE
The Adobe document pointed to mentions only "video" source in its details. Is this a video only effect? Can the Haze Removal video effect apply to stills as well as videos? Does use of the Haze Removal video effect offer any advantages over the use of the Adjust/Lighting feature?
OBSERVATIONS
Examples With JPEG Photo Source Media
Atmospheric Haze in Early Morning
Original
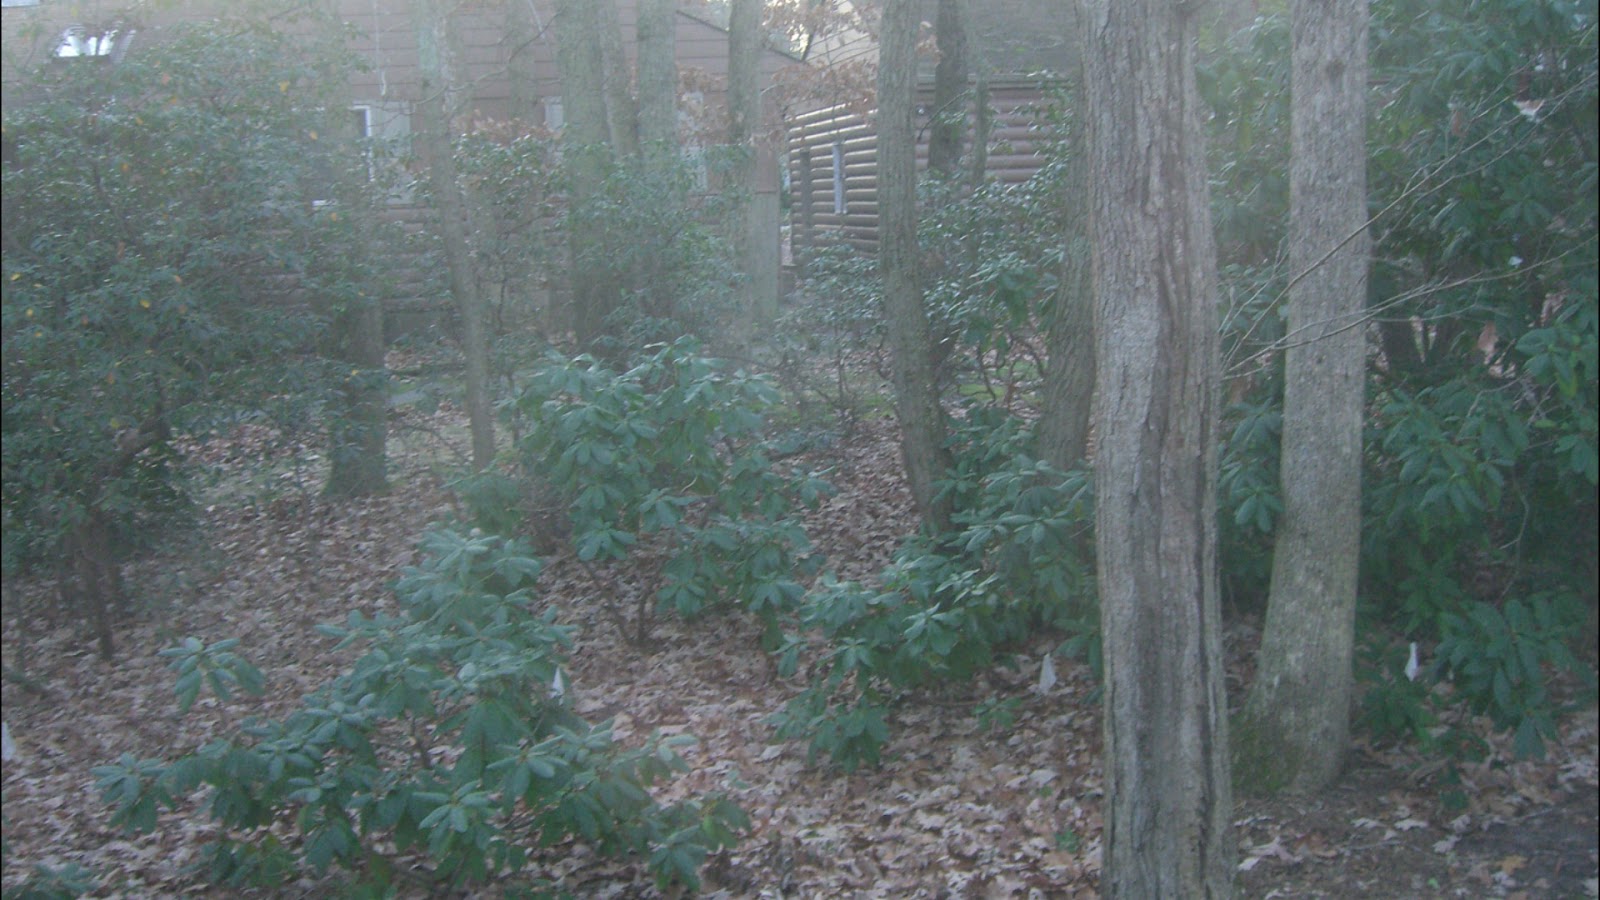 |
| Figure 1 |
Haze Removal Effect (Auto Haze Removal)
 |
| Figure 2 |
Haze Removal Effect (Maximum Custom Settings For Haze Removal And Sensitivity)
 |
| Figure 3 |
Adjust/Lighting Panel (Custom Settings For Brightness, Contrast, Exposure, Black, White)
 |
| Figure 4 |
Haze Removal Effect (Maximum Custom Settings For Haze Removal And Sensitivity)
Followed By
Adjust/Lighting Panel (Custom Settings For Brightness, Contrast, Exposure, Black, White)
 |
| Figure 5 |
Figure 2 Haze Removal Effect (With Auto Haze Removal)...To apply the effect, FIX right vertical bar/fx icon/Effects/Video/Advanced Adjustments/Haze Removal)....Using the "Auto Haze Removal" setting in the editing area for the effect, the Haze Removal and Sensitivity sliders were each found at 0.70. In this "Auto" mode, the "Haze Removal" slider was not active, but the "Sensitivity" slider was active. See Figure 6 which shows editing area for the Haze Removal effect that was applied.
 |
| Figure 6. Applied Effects/Haze Removal Using Auto Haze Removal Option. |
Figure 4 Adjust/Lighting (With Custom Settings For Brightness, Contrast, Exposure, Black, White...Top icon of FIX list/Adjustments/Lighting. Under the "More" button, the sliders are all found set to 0.0. Then custom settings used were Brightness = 3; Contrast = 19; Exposure = -7; Black = 31; White = 0.0. This feature also has Auto Levels, Auto Contrast, and Auto Fix options which were not used in the example. Lighting has a Reset option at the bottom left of its panel. See Figure 7.
 |
| Figure 7. Adjustments/Lighting/"More" Slider Settings For Figure 4 Result. Lighting Panel Widened Horizontally So That Black And White Headers Were Visible At The Same Time As For the Brightness, Contrast, And Exposure Headers. |
Lighting Panel Settings Using Buttons....
Brightness, Contrast, Exposure each has 9 setting buttons (100, 80, 60, 40, 20, -20, -40, -70, and -100). Black and White each have 9 setting buttons (10, 20, 30, 40, 50, 60, 70, 80, 90). The graphic in each header's buttons offers a relative view of effect resulting from choice of a particular button.
Lighting Panel Settings Using Sliders...
Each header has slider setting under "More" option. (Note relationship of button and slider settings...for example, if the Brightness, Contrast, or Exposure button for 60 is selected, the "More" slider will be set at 60.) The Black and White headers typically are not visible unless the Lighting panel is expanded horizontally or the next/previous arrow at the right and left of the headers is used to move Black and White into the visible area. The Lighting Panel has a "More" or "Less" viewing option. Access to the sliders is by selecting the More option at the bottom right of the Lighting panel.Figure 5 Haze Removal Effect (With Maximum Custom Settings For Haze Removal And Sensitivity)
Followed By Attempted Image Improvement Using
Adjust/Lighting (With Custom Settings For Brightness, Contrast, Exposure, Black, White)
After the Haze Removal Effect was customized to maximum setting 1.00, the Adjust/Lighting was applied to that same photo. In this case, the Adjust/Lighting sliders were custom set to Brightness 45. Contrast 21, Exposure 31, Black 32, and White 15.
COMMENTARY
The initial study was done subjecting an unedited hazy jpeg photo to Premiere Elements 15 Haze Removal effect and/or Lighting Adjust features, followed by export of each Timeline jpeg photo using Export & Share/Image/. As a backup check, the 5 Timeline photos (original, Haze Removal effect auto, Haze Removal custom, Adjust/Lighting, Haze Removal effect + Adjust Lighting) were exported as one wmv video using Export & Share/Device/Custom/Windows Media. See Video below.
Custom Premiere Elements 15 export settings for this wmv video included: 1920 x 1080, 29.97 frames per second, square pixels (1.0), 10000 kbps (kilobits per second) VBR, 2 Pass.
The better haze removal results might be expected from use of the Premiere Elements 15 Haze Removal effect (maximum Haze Removal and Sensitivity setting 1.00), followed by use of Adjust Lighting feature as needed for Brightness, Contrast, Exposure, Black, White options. It would appear that the Haze Removal effect can be applied to Timeline video as well as jpeg photo. More results from more video/photo source media need to be looked at. Work in progress.
_____________________________________________________________________________
ATR